
How to Write a Blog Post in 2026 (Step-by-Step Framework)

Yi
SEO Expert & AI Consultant

Writing a blog post is not hard. Writing one that gets read, cited, ranked, and remembered is the real work.
In 2026, a strong blog post needs to do several jobs at once. It has to answer the reader's question quickly, show enough experience to be trusted, work on mobile, support search visibility, and give AI search systems clear, quotable information to summarize. That sounds like a lot, but I have found that most posts do not fail because the writer missed one clever tactic. They fail because the work happened in the wrong order.
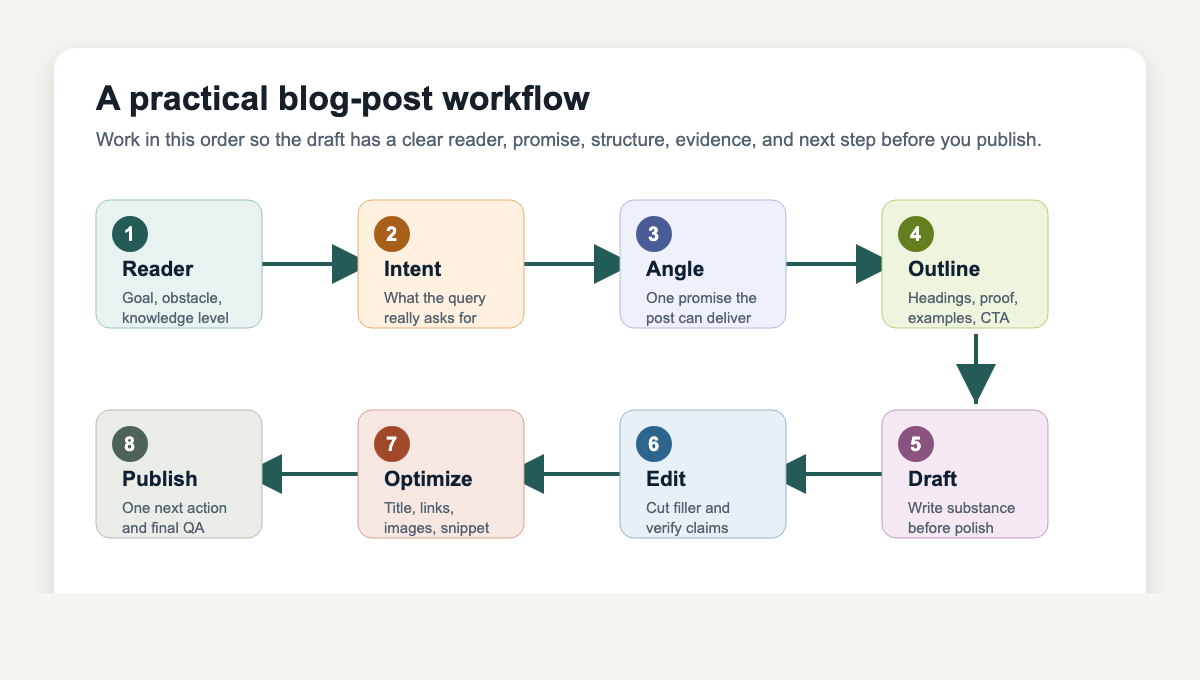
The framework below is the process I would use for a serious blog post: define the reader, choose a focused angle, outline the answer, draft with examples, add evidence, edit hard, optimize the page, and publish with a clear next step.
TL;DR: How to write a blog post
To write a good blog post, start with one reader problem, not a vague topic. Turn that problem into a specific headline, outline the answer before drafting, write the introduction after you know the promise, support the body with examples or sources, and finish with one useful next action.
For SEO and AI Search, make the article easy to parse: use descriptive headings, short definitions, tables where comparison helps, specific examples, internal links that genuinely support the topic, and source-backed claims when the advice depends on evidence. Google's own guidance still points back to the same core idea: create helpful, reliable, people-first content rather than pages made mainly to manipulate rankings. Google also now recommends non-commodity, expert-led content for generative AI search visibility, which is another way of saying the post needs a real point of view, not just a rewritten outline from the SERP. Google's people-first content guidance and AI Search optimization guidance are worth keeping in mind while you edit.
Here is the short version:
| Stage | What to do | Why it matters |
|---|---|---|
| Reader | Define who needs the post and what they already know. | Specific readers make specific writing possible. |
| Intent | Search the topic and identify the real query behind it. | The post will struggle if it answers the wrong question. |
| Angle | Pick one promise the article can fully deliver. | A focused post is easier to rank and easier to read. |
| Outline | Plan the H2s, examples, evidence, and next step. | Structure prevents repetition and missing sections. |
| Draft | Write the clearest useful version before polishing. | You need substance before style. |
| Edit | Cut filler, verify claims, improve flow, and tighten links. | Editing turns a draft into something publishable. |
| Optimize | Review title, meta description, images, links, and CTA. | Search visibility depends on clarity, not keyword stuffing. |
What makes a blog post good in 2026?
A good blog post solves a real reader problem in a way that is clear, complete, and trustworthy.
| Step | Reader question it answers | Skip risk |
|---|---|---|
| Intent | What job am I hiring this post for? | Ranking for the wrong SERP |
| Outline | What decisions happen in order? | Repeated sections |
| Examples | Why should I trust this? | Generic claims |
| Edit | Would I send this to a customer? | Fluent but empty pages |
2026 didn’t invent a new blog formula. It raised the cost of publishing something interchangeable.
How To ACTUALLY Write A Blog Post From Start To Finish | Neil Patel
That sounds obvious, but many posts fail because they mistake length for value. I am fairly blunt about this when editing: a 4,000-word article can still be thin if it repeats generic advice, while a 900-word article can be excellent if it gives the reader the exact answer they need, with enough context to act.
For most how-to posts, the core elements are simple:
- a clear audience
- a specific search intent
- a headline that promises the right outcome
- an introduction that gets to the point
- a body organized around the reader's next decisions
- examples, sources, visuals, or templates where they help
- internal links that give useful next steps
- a conclusion or CTA that does not ask the reader to do five things at once
The mistake I see most often is starting with format instead of purpose. Before you decide whether the post should be a listicle, tutorial, case study, or thought piece, decide what job it needs to do. A beginner needs explanation. A buyer needs comparison. A practitioner needs a workflow. A skeptical reader needs proof. The format should serve that job, not lead it.
1. Define the reader before you choose the angle
The fastest way to write a vague blog post is to write for "people interested in the topic." That audience is too broad to guide any real decision.
Before you outline, write one sentence that describes the reader:
This post is for [type of reader] who wants to [goal] but is struggling with [specific obstacle].
For this article, the reader might be a marketer, founder, blogger, or content writer who already knows what a blog post is but wants a repeatable way to write one that performs. That tells me not to spend half the article defining blogging. It also tells me to focus on workflow, search intent, examples, editing, and publishing quality.
Ask these questions before drafting:
- What does the reader want to accomplish after reading?
- What have they probably already tried?
- What would confuse them if I skipped it?
- What would feel too basic or patronizing?
- What action should they take after the post?
If you are writing for a company, this is also where tone matters. A post for technical buyers should not sound like a lifestyle newsletter. A post for beginner creators should not sound like enterprise documentation. Your brand voice gives the article a consistent personality, but the reader's situation should decide the level of detail.
2. Match search intent before you write the outline
Search intent is the reason behind the query. When someone searches "how to write a blog post," they usually do not want a history of blogging. They want a process they can follow, preferably without having to translate generic writing advice into actual steps.
Search intent usually falls into a few practical categories:
| Intent | What the reader needs | Blog-post example |
|---|---|---|
| Informational | A clear explanation or answer. | "What is a blog post?" |
| How-to | A sequence of steps. | "How to write a blog post." |
| Comparison | Help choosing between options. | "Blog post vs article." |
| Commercial | Confidence before trying a tool or service. | "Best AI blog generators." |
For this topic, the winning format is a how-to guide with a checklist. That means the article should move in the order the reader will actually work: idea, intent, outline, draft, edit, optimize, publish.
Competitor review matters here, but not because you should copy the top pages. When I review a SERP, I use it to understand what Google and readers expect, then look for gaps. If every ranking page says "write a headline," your job is not to repeat that line. Your job is to explain what a strong headline must do, show examples, and connect it to the promise of the post.
3. Pick a topic narrow enough to finish
A blog post needs a clear boundary. "Blogging tips" is not a useful topic because it can go anywhere. "How to write a blog post for a new SaaS feature" is much easier to shape because the audience, purpose, and examples are obvious.
A focused topic usually has three parts:
- The subject: blog post writing, email onboarding, product pages, local SEO.
- The reader: beginners, SaaS marketers, ecommerce founders, agency writers.
- The outcome: publish faster, rank better, convert trials, explain a process.
If you cannot state the topic in one clean sentence, narrow it before drafting. I usually keep narrowing until the examples become obvious; that is often the moment the article starts to take shape. A SEO content brief generator can help turn a loose idea into a working brief with search intent, headings, questions, and internal link notes.
For a manual version, fill in the promise, audience, H2s, examples, and CTA before you write the body. A simple blog post outline template keeps those decisions visible while you draft.
The goal is not to make the topic small. The goal is to make it answerable. Big topics are fine when the article has a clear edge; vague topics are what create padded drafts.
4. Write a working headline that defines the promise
I like writing a working headline early because it forces a decision. The headline tells you what the article is allowed to include and what it should leave out.
A weak headline names the topic:
Blog Writing Tips
A stronger headline promises a useful outcome:
How to Write a Blog Post That Ranks, Gets Read, and Drives Action
The second headline is better because it gives the article a job. Now every section has to support ranking, readability, or action. If a section does not help with one of those, it probably does not belong.
Good headlines are usually:
- clear before clever
- specific without becoming cramped
- aligned with the search query
- honest about what the post delivers
- short enough to work in search results and social previews
For brainstorming, a headline generator can give you starting points, but do not publish the first output untouched. The final headline should match the article you actually wrote. A practical article needs a practical headline; a case study needs a result; a checklist needs a clear task.
5. Build the outline around decisions, not just subtopics
Most outlines are too flat. They list topics, but they do not guide the reader through decisions.
For example, this is a weak outline:
- introduction
- headlines
- keywords
- images
- editing
- conclusion
This is stronger:
- define the reader and goal
- confirm search intent
- choose a focused angle
- draft a headline that sets the promise
- outline the post in the order the reader needs it
- write the introduction after the promise is clear
- support the body with examples, evidence, and visuals
- edit for clarity and trust
- optimize title, description, links, images, and CTA
The second outline has movement. It follows the work. That matters more than it sounds. A good outline should feel like a reader making progress, not like a writer emptying a notebook.
Before writing, check the outline against three questions:
- If someone only read the headings, would they understand the process?
- Does each section answer a different reader need?
- Is anything missing that the reader would need before publishing?
This is also the right time to plan links. Internal links should not be sprinkled in after the article is finished. I prefer planning them while the outline is still flexible, because the best links usually support a decision the reader is making in that section. If the post will mention editing, plan where the blog post editing checklist belongs. If it discusses meta descriptions, reserve that link for the publishing section where the reader is actually optimizing the snippet.
6. Write an introduction that earns the next scroll
The introduction has one job: make the reader confident they are in the right place.
A good blog introduction usually does three things quickly:
- Names the problem.
- Explains why it matters.
- Shows what the reader will get.
You do not need a dramatic hook every time. In practical content, clarity often works better than suspense. I have tested plenty of clever intros, and the plain version usually wins when the reader came for a task.
Here is a simple formula:
Writing [thing] is easy. Writing [better version] is harder because [reason]. In this guide, you will learn [specific outcome].
For example:
Writing a blog post is easy. Writing one that answers the right query, keeps readers engaged, and supports search visibility takes more structure. This guide walks through the workflow from idea to published post.
That is not flashy, but it works. It sets the topic, raises the standard, and tells the reader what to expect. A good introduction should reduce uncertainty, not show off.
If you use AI for the first draft, pay special attention to the introduction. AI-generated intros often start with broad lines like "In today's digital world..." or "Content is king." Cut that. A humanizer can help smooth stiff phrasing, but the real fix is usually sharper thinking: say what is actually at stake for this reader.
7. Draft the body with examples, not slogans
The body of the post is where trust is won or lost.
Generic advice sounds like this:
Add value to your readers.
Specific advice sounds like this:
If the post tells readers to write better introductions, show one weak intro and one stronger intro. Explain what changed: the stronger version names the reader's problem, cuts the throat-clearing, and promises a useful outcome.
That level of detail is what makes a post useful. The reader can see what to do. In my experience, examples do more for trust than adjectives ever will.
Use these elements when they help:
- Definitions for terms a beginner might not know.
- Numbered steps for a process.
- Tables for comparisons or checklists.
- Screenshots when the reader needs to see a tool or interface.
- Examples when advice could otherwise sound abstract.
- External sources when claims depend on evidence.
- Internal links when the reader may need a deeper next step.
Not every post needs all of these. A simple how-to may only need steps and examples. A product comparison may need tables and screenshots. A research-heavy article may need citations. The point is to choose the component that helps the reader complete the task.
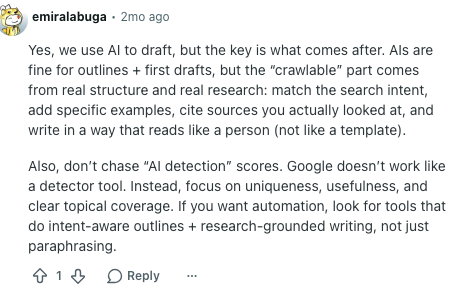
If you use an AI article writer, give it the brief, outline, audience, tone, examples, and source requirements. Then edit the draft like a human editor. My opinion: AI is useful for momentum, but dangerous when it becomes the only source of judgment. It can help you move faster, but it cannot decide which parts of your experience matter most unless you give it that material.
8. Make the post easy to scan and easy to quote
Readers scan before they commit. AI systems also benefit from clean structure because clear headings, definitions, and tables make the page easier to summarize.
That does not mean writing for machines. It means writing cleanly enough that both people and retrieval systems can understand the page. I would not contort a sentence for AI visibility, but I will happily make a messy section clearer if that helps everyone parse it.
Use this scanability checklist:
- Keep paragraphs short, especially near the top.
- Use H2s for major steps and H3s only when the section needs substructure.
- Put the direct answer before the supporting explanation.
- Use bullets for lists, not long comma chains.
- Define important terms in plain language.
- Avoid burying examples under five paragraphs of setup.
- Add a table when comparison would otherwise become repetitive.
The best test is simple: scroll through the article and read only the headings, tables, and first sentence of each section. If the main argument still makes sense, the structure is probably strong. If it does not, polishing individual sentences will not fix the larger problem.
For a final readability pass, use a readability improver to flag dense phrasing, but do not flatten every sentence. Some rhythm and personality should stay. The goal is clear writing, not sterile writing.
9. Add visuals and evidence where they make the post stronger
Visuals should explain, prove, or simplify something. They should not exist just to break up text.
Useful visuals include:
- a screenshot of a keyword tool when teaching keyword research
- a before/after example when teaching editing
- a workflow diagram when explaining a repeatable process
- a chart when data changes the reader's understanding
- a template image when the reader needs a model to copy
For this kind of article, the most useful evidence is usually structural rather than statistical: a clear workflow table, a before/after example, a checklist, and a few authoritative sources. If you add images, make sure they carry meaning. A blog images generator can help create a custom visual, but I would rather use one useful diagram than three decorative images that only make the page longer.
External evidence should be used sparingly. Link to sources when they support a claim the reader may reasonably question. For example, when discussing SEO and AI Search, official Google documentation is stronger than a random roundup article. When discussing writing style, a before/after example may be more helpful than a statistic. More citations do not automatically create more trust; better evidence does.
10. Optimize for SEO without making the post worse
SEO should make the post clearer. If it makes the writing clunky, you are doing it wrong. My rule is simple: optimization should clarify the promise, structure, and next step. It should not make the article sound like it was written for a keyword spreadsheet.
Before publishing, check these elements:
| Element | What to check |
|---|---|
| H1 | Does it clearly match the main query and article promise? |
| URL slug | Is it short, readable, and aligned with the topic? |
| Meta title | Does it fit search results and create a reason to click? |
| Meta description | Does it summarize the value of the article in plain language? |
| Headings | Do they help readers navigate the page? |
| Internal links | Does each link support the paragraph around it? |
| External links | Do they back up claims or send readers to useful primary sources? |
| Images | Do filenames, captions, and alt text describe the actual visual? |
| CTA | Is there one clear next action? |
A meta title generator can help you compress the article promise into a search-friendly title tag, but the final title still needs to match the page exactly. I do not like title tags that promise more than the article delivers; they may win a click, but they lose the reader quickly.
For the description, write one sentence that tells the reader what they will get and why it is useful. A strong meta description does not need to summarize every section; it needs to make the right reader confident the page answers their query.
Do not stuff the keyword into every heading. Use the main phrase naturally in the title, introduction, one or two headings if relevant, and the conclusion. Then use related language that readers would actually expect: outline, draft, headline, intro, edit, SEO, CTA, examples, search intent, and publishing checklist.
11. Edit for clarity, trust, and usefulness
Editing is not just proofreading. It is the stage where you decide whether the article deserves to be published.
I like to edit in passes because it keeps the work honest. If you try to fix structure, links, style, evidence, and typos at the same time, you will usually miss the real weakness.
- Structure pass: Does the order make sense?
- Usefulness pass: Does every section help the reader complete the task?
- Specificity pass: Are there examples, definitions, or evidence where needed?
- Link pass: Are internal and external links natural and helpful?
- Style pass: Is the writing clear, human, and easy to read?
- Proofread: Are grammar, spelling, formatting, and markdown clean?
Cut anything that only sounds important. Phrases like "unlock your potential," "in the digital age," and "take your content to the next level" rarely help. Replace them with the actual advice.
Here is a quick before/after:
| Weak | Stronger |
|---|---|
| Optimize your blog post for maximum impact. | Check whether the title, intro, headings, and CTA all promise the same outcome. If the title says "step-by-step," the body should actually move in steps. |
| Add engaging visuals. | Add a screenshot when the reader needs to see a tool, a table when they need to compare options, or a diagram when the process has too many moving parts. |
| Know your audience. | Write one sentence describing who the reader is, what they want, and what is stopping them. Use that sentence to choose examples. |
Good editing makes the article more direct. If the post gets shorter and stronger at the same time, you are probably doing it right. The hardest cuts are often the paragraphs that sound polished but do not help the reader do anything.
12. Publish with one clear next step
The conclusion should not restart the article. It should close the loop.
Return to the original reader problem, remind them of the process, and give them one next action. If the post is educational, the next action might be drafting an outline. If it is commercial, it might be trying a tool. If it is strategic, it might be auditing an existing post. I usually choose the action that creates the least friction and the most momentum.
For this topic, the cleanest next step is simple: build the brief before you write. Once the audience, intent, headline, outline, examples, and CTA are clear, the draft becomes much easier. Skipping that step can feel faster, but it usually just moves the hard decisions into the editing stage.
If you want a faster starting point, Junia's blog post generator can turn a topic into a structured draft. Treat that draft as the beginning, not the finished article. Add your examples, verify claims, improve the internal links, and edit until the post sounds like it came from someone who actually understands the reader.
Blog post publishing checklist
Use this final checklist before you publish:
- The article answers the main query in the first few paragraphs.
- The reader, search intent, and article promise are clear.
- The headline is specific and honest.
- The introduction gets to the point without generic setup.
- The outline follows the order the reader needs.
- Each section adds a new idea, example, or decision.
- Claims that need support have credible sources.
- Internal links feel natural and are not repeated unnecessarily.
- External links point to trustworthy, relevant sources.
- Images have a purpose and accurate descriptions.
- The meta title and meta description match the article.
- The article has one clear next step.
- The final edit removes filler, repetition, and vague AI-sounding language.
The best blog posts do not feel assembled from a formula. They feel like a clear answer from someone who understands the problem. Use the framework, but do not let it flatten your voice. The structure gets the reader in the door; the usefulness, judgment, and lived-in examples are what make them stay.